Homeownership comes with its fair share of responsibilities, one of which is maintaining your home’s plumbing system. While some plumbing jobs definitely require the help of a professional, there are some tasks that you can learn to do yourself, like replacing your toilet’s flush valve. In this blog post, we will guide you through the process of replacing a flush valve, and arm you with enough knowledge to tackle this task confidently.
Table of Contents
What is a Flush Valve and Why Replace It?
Picture this – you press the handle, your toilet flushes, and you go about your day. But, have you ever stopped to wonder what happens behind the scenes? That’s where the unsung hero of your bathroom, the flush valve, comes in. This often overlooked piece of plumbing wizardry is the gatekeeper that directs water from your tank to the bowl when you flush, and then snaps shut to refill the tank for your next visit.
But why would you need to replace it? Over time, this superhero can lose its touch. It may become worn or damaged, causing your toilet to run continuously, leak, or not flush properly. This not only leads to an annoying “phantom flush,” but it can also have a big impact on your water bill.
Changing your flush valve is like giving your toilet a new lease on life. It’s a relatively easy and cost-effective way to keep things running smoothly and to prevent the need for more serious, expensive repairs down the line. Plus, you’ll get the satisfaction of knowing you’ve done it yourself.
So now that you’re familiar with what a flush valve does and why you might need to replace it, let’s dive into how you can do just that.
Identifying the Type of Flush Valve in Your Toilet
Let’s set the stage for the hero of our story – your toilet’s flush valve. As with many heroes, they come in different forms. In the world of toilets, there are primarily two types of flush valves you’ll encounter: the flapper and the canister.
Picture the flapper like a cap that lifts when you flush, letting water from the tank rush into the bowl. Once the flush is complete, it drops back down, sealing the tank and allowing it to refill for your next visit. On the other hand, the canister valve functions a bit differently. It’s a tube-like device that rises and lowers within the tank, controlling the flow of water during a flush.
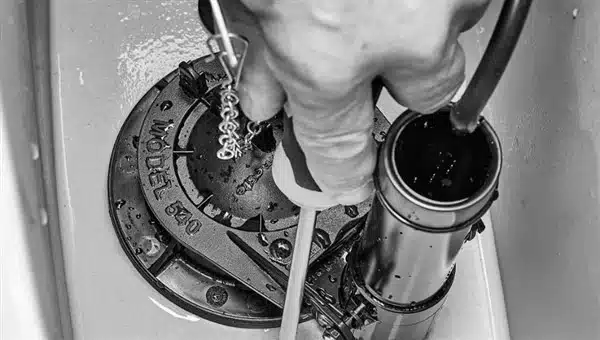
Wondering which one your toilet has? The clues are right in front of you. Simply lift the lid off your toilet tank, and you’ll find your answer. If you see a rubber or plastic cap attached to a chain, you’re looking at a flapper valve. If you see a cylinder or tower-like structure, you’ve got a canister valve.
Knowing which type of flush valve your toilet has is crucial. It will not only help you buy the right replacement part but also guide you through the installation process. So, peek inside that toilet tank and let’s continue with our DIY plumbing journey.
Tools Needed for Flush Valve Replacement
Roll up those sleeves and gather your tools! We’re about to embark on our DIY plumbing adventure. To replace a flush valve, you won’t need a fully stocked plumber’s toolkit – just a few essentials will do. Here’s what you’ll need:
- An adjustable wrench: This tool’s ability to change sizes will come in handy when dealing with various bolts and fittings.
- A pair of pliers: These will be useful for tightening and loosening nuts and other small parts.
- A flat-head screwdriver: You’ll need this for removing and installing screws.
- A sponge or towel: These will help to soak up any remaining water in your toilet tank once you’ve drained it.
- A bucket: This will be used to catch any excess water when draining the tank.
- A new flush valve: Remember our hero from the previous section? You’ll need to replace the old one with a new, fully-functioning flush valve.
- Optional: Teflon tape: This handy tool is used to create watertight seals around threads. It might not always be needed, but it’s good to have on hand just in case.
- Optional: Gloves: While not essential, they can help keep your hands clean during the process.
Armed with these tools, you’re ready to tackle your flush valve replacement. Let’s move on to the step-by-step process, shall we?
Related content: Toilet Flapper Replacement
Step-by-Step Guide on Replacing a Flush Valve
Let’s get to work! Replacing a flush valve isn’t as complicated as it might sound, and we’ve broken down the process into easy-to-follow steps for you.
Firstly, stop the flow of water to your toilet by shutting off the water supply. The shut-off valve is commonly situated on the wall adjacent to the toilet. Turn it clockwise until it’s tight. Once that’s done, flush your toilet to drain the water from the tank. There might be some water left in the bottom of the tank. Use a sponge or towel to mop it up or catch it with a bucket.
Now, you’re ready to remove the old flush valve. Start by disconnecting the lift chain or rod from the trip lever. If you have a flapper valve, remove it by unhooking it from its base. If you have a canister valve, unscrew the mounting nut at the base of the valve, and lift it straight up and out.
Next, unscrew the large locknut on the underside of the tank that secures the flush valve. Take care to hold onto the valve as you do this so it doesn’t fall out. Once the locknut is off, you should be able to pull the old valve out from the top of the tank.
Now, we’ve reached the climax of our plumbing adventure – installing the new flush valve! Insert the new valve into the hole in the bottom of the tank. From underneath, screw on the new locknut. Tighten it just enough to make a good seal, but not so tight that you crack the tank.
Finally, reattach the lift chain or rod to the trip lever. Make sure it has a little slack when the valve is closed, but not so much that it can get caught under the valve.
Congratulations, you’ve just replaced your flush valve! Turn the water supply back on and give your toilet a flush to test out your handiwork. Your toilet should now be running smoothly, thanks to your efforts. You’ve earned some serious homeowner bragging rights!
Related Content: Fill Valve Replacement
Tips and Tricks for a Successful Flush Valve Replacement
Ready to tackle your flush valve replacement like a pro? Let’s boost your confidence with some handy tips and tricks!
First, make sure to double-check the type of your flush valve before buying a replacement. As we mentioned earlier, it could either be a flapper or a canister valve. The wrong type won’t fit, and it’s frustrating to pause your project for a return trip to the hardware store.
While we’re on the subject of trips to the hardware store, don’t forget to have all your tools at the ready before you start. You’ll feel like a well-prepared plumber with your adjustable wrench, pliers, screwdriver, sponge or towel, and bucket by your side.
When installing the new valve, be careful not to overtighten the locknut. Cracking your toilet tank is a situation you want to avoid at all costs! It’s one of those ‘Goldilocks’ scenarios – not too loose, not too tight, but just right.
Also, when reattaching the lift chain or rod, ensure it has enough slack so it won’t get caught under the valve, but not so much that it’s droopy. It’s all about striking the perfect balance for a smooth, flawless flush.
Finally, be patient with yourself. You’re stepping into the exciting world of DIY home repairs and learning something new. If it doesn’t go perfectly the first time, remember, practice makes perfect. Plus, you’ve already saved yourself a potential plumbing bill, and that’s a win in our book!
When to Call a Professional Plumber
Despite the empowering sense of accomplishment that comes with mastering DIY home repairs, there are moments when it’s best to enlist the expertise of a professional plumber. Your flush valve replacement mission might turn into a ‘call of duty’ for a pro under the following circumstances:
First off, if your toilet is leaking around the base, even after you’ve replaced the flush valve, it might indicate a more serious issue that could involve the toilet’s wax ring or the drainpipe. These are tasks that typically require a seasoned hand.
Secondly, if you notice cracks in your toilet tank or bowl while working on your flush valve replacement, stop right there and call a pro. Dealing with cracks can lead to water damage and should not be taken lightly.
Also, if you have replaced the flush valve but your toilet is still not flushing properly, or it’s making strange noises, it’s time to call in reinforcements. This could signal that the problem lies elsewhere in the toilet’s internal mechanism.
Lastly, if you feel out of your depth at any point during the process, there’s absolutely no shame in calling for backup. Plumbing can be complex and, sometimes, it’s more cost-effective and less stressful to have a professional handle the issue.
FAQs
Is it easy to change a flush valve?
Replacing a toilet flush valve is a task that does not pose significant difficulty, but it necessitates a certain level of patience. To complete the task, you must detach the toilet tank from its location on the bowl. It is important to exercise caution throughout this process, as the porcelain tank is prone to cracking if mishandled. Ensure the purchase of a flush valve that is compatible with your toilet.
What is the life expectancy of a flush valve?
The flush valve of the toilet generally has a lifespan of 8-10 years. The lifespan of a toilet fill valve is typically limited to five to six years. Typically, you can anticipate the need to periodically repair the components of your toilet while retaining the physical bowl.
What is the difference between a fill valve and a flush valve?
The toilet tank consists primarily of two essential components: the toilet flush valve, responsible for releasing a surge of water into the bowl during the flushing process, and the fill valve, which allows the tank to be replenished with water after each flush. When a toilet constantly or sporadically continues to run, one of these valves is typically the cause.
Conclusion
It is important to keep in mind that the journey of every homeowner is full of opportunities for learning. You have acquired valuable experience and knowledge, regardless of whether you are successful in replacing the flush valve on your own or whether you resort to calling a plumber. You should therefore consider it a victory, regardless of the outcome!
