Many homeowners overlook the bathroom when considering home improvements, failing to recognize the potential for transformation it holds. However, upgrading your toilet can be a simple yet impactful change to make. With contemporary options, not only can you improve the overall look of your bathroom, but you can also enhance its comfort, efficiency, and hygiene with added features. This blog post aims to explore the benefits of investing in a high-quality toilet from a trusted brand, and how it can significantly improve your living space.
Table of Contents
Exploring Kohler, Toto, and Duravit Toilets
When it comes to upgrading your home, the bathroom is often a space that’s overlooked, yet it holds significant potential for improvement. One of the simplest yet most impactful changes you can make is a toilet installation. Modern toilets not only elevate the look of your bathroom but also come packed with features designed to enhance comfort, efficiency, and hygiene. The ensuing section delves into the reasons why purchasing a superior toilet from renowned brands such as Kohler, Toto, and Duravit can significantly enhance the comfort and value of your residence.
Enhanced Bathroom Aesthetics with Kohler Toilets
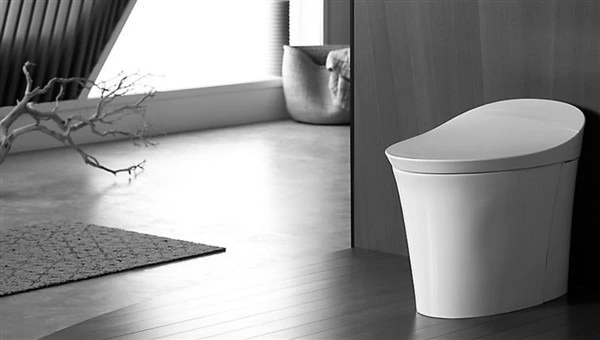
Kohler stands at the forefront of blending form with function, creating toilets that serve as a focal point in any bathroom redesign. Their range of models showcases an unparalleled dedication to craftsmanship and aesthetic appeal. Opting for a Kohler toilet installation introduces a touch of sophistication and modernity to your space, with designs that range from the minimalistic to the boldly avant-garde. Each piece is a testament to Kohler’s commitment to elevating bathroom interiors with fixtures that are as visually stunning as they are practical.
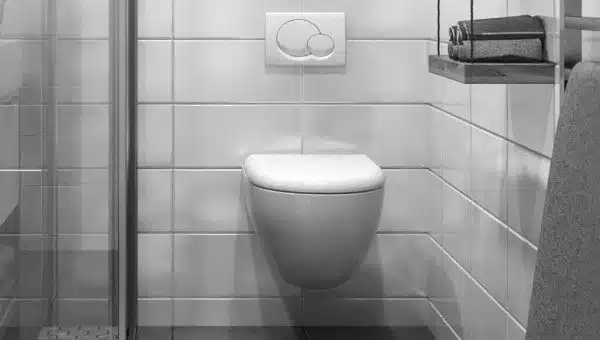
The diversity in Kohler’s portfolio ensures that whether your bathroom theme is traditional, contemporary, or somewhere in between, there’s a Kohler toilet that aligns with your vision. The brand’s one-piece toilets, for instance, boast a streamlined silhouette that not only adds a sleek look to your bathroom but also simplifies cleaning. On the other hand, their wall-hung toilets offer a space-saving solution without compromising on style, making them ideal for smaller bathrooms or for those seeking a minimalist aesthetic.
Kohler’s dedication to design extends to the color and finish of their toilets, offering options beyond the classic white to include shades and textures that can match or accentuate your bathroom’s palette. This flexibility allows homeowners to truly personalize their space, creating a bathroom that reflects their unique taste and lifestyle. By integrating innovation with elegant design, a Kohler toilet doesn’t just meet the functional requirements of a bathroom fixture; it transforms the space, setting a tone of refined comfort and understated luxury.
Unmatched Hygiene and Comfort with Toto Toilets
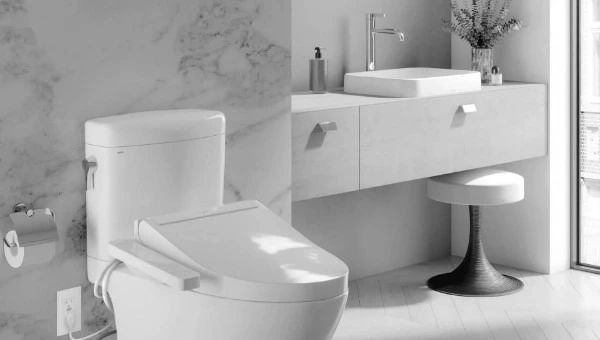
Toto is a name synonymous with cutting-edge hygiene technology in the world of bathroom fixtures. Their toilets are designed to elevate the user’s experience by integrating features that ensure cleanliness and provide unparalleled comfort. Among their innovations is the Toto Washlet, a bidet seat that revolutionizes personal hygiene with its warm water cleansing and gentle air-drying capabilities. This feature not only enhances cleanliness but also offers a spa-like experience in the comfort of your own bathroom.
In addition to superior hygiene, Toto prioritizes user comfort through thoughtfully designed toilets. The ergonomic seats and optimal heights cater to a wide range of individuals, ensuring accessibility and ease of use for everyone. Moreover, Toto’s attention to detail extends to the construction of their toilets. The rimless design and the application of CeFiONtect glaze work together to create a surface that repels mold, mildew, and bacteria. This not only makes cleaning effortless but also maintains a healthier bathroom environment by significantly reducing the potential for germ buildup.
Another aspect that sets Toto toilets apart is their commitment to innovation in flushing technology. Their toilets feature powerful yet efficient flush systems that minimize water usage while maximizing cleanliness, thereby supporting both environmental sustainability and hygiene.
For homeowners focused on creating a bathroom that does not compromise on hygiene or comfort, installing a Toto toilet is a decision that aligns with both priorities. With Toto, every visit to the bathroom is transformed into an experience of comfort and cleanliness, underscoring the brand’s reputation as a leader in bathroom hygiene and innovation.
Water Efficiency: Save the Planet with Duravit Toilets
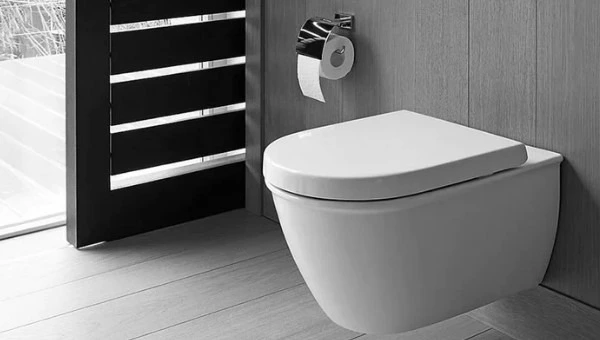
Duravit leads the way in eco-friendly bathroom innovations, emphasizing water conservation without sacrificing performance. Their advanced flushing systems are designed to use significantly less water, embodying Duravit’s commitment to sustainable living and environmental stewardship.
Opting for a Duravit toilet means embracing a solution that conserves precious water resources, reflecting a growing trend toward eco-conscious home improvements. The brand’s toilets are engineered to maximize the power of each flush while minimizing water consumption, a key feature for homeowners looking to reduce their ecological footprint and utility bills.
Duravit’s pioneering approach to water efficiency goes beyond just saving water; it’s about integrating sustainable practices into our daily lives. By installing a Duravit toilet, individuals contribute to a larger movement of environmental responsibility, aligning personal values with actions that benefit the planet.
This focus on sustainability is complemented by the brand’s sleek designs and high-quality craftsmanship, ensuring that eco-friendly choices do not compromise on style or durability. Choosing Duravit not only represents a smart investment in your home’s functionality but also signifies a commitment to preserving our planet’s most vital resources for future generations.
Long-Term Durability and Reduced Maintenance
Opting for a high-quality toilet from renowned brands like Kohler, Toto, or Duravit not only enhances the aesthetics and functionality of your bathroom but also stands as a testament to enduring quality.
These brands have earned their reputation through the use of superior materials and advanced manufacturing techniques, ensuring that your toilet can handle the rigors of daily use without succumbing to wear and tear. The advantage of such durability is twofold: it significantly diminishes the likelihood of frequent repairs and replacements, which can be both costly and inconvenient.
Kohler, Toto, and Duravit toilets are designed with innovative features that contribute to their longevity. For example, their high-grade ceramic construction is complemented by protective glazes that resist scratches, stains, and the growth of bacteria.
This means that the surfaces stay cleaner for longer, maintaining their pristine appearance with minimal effort. Additionally, the internal mechanisms are built to deliver consistent performance year after year, with flush valves and other components that resist corrosion and degradation.
The benefit of reduced maintenance goes beyond the financial savings. It also means fewer headaches for homeowners, who can trust in the reliability of their bathroom fixtures without constant attention or concern. This reliability is not just a matter of convenience; it’s a reflection of the brands’ commitments to excellence and customer satisfaction.
Choosing a toilet from Kohler, Toto, or Duravit is thus a smart investment in the long-term comfort, beauty, and functionality of your home, ensuring peace of mind and sustained performance without the hassle of frequent maintenance.
Advanced Features for Enhanced User Experience
The toilets manufactured by Kohler, Toto, and Duravit are not your ordinary bathroom fixtures. They are equipped with a suite of advanced features designed to cater to the needs of the modern user, ensuring a seamless and luxurious bathroom experience.
For instance, imagine the comfort of sitting on a heated seat during colder months, or the convenience of an automatic lid that opens and closes without you having to touch it. These brands have taken hygiene and ease of use to the next level with touchless flushing technology, eliminating the need to physically handle the flush mechanism and thereby reducing the spread of germs.
In addition to these comfort and hygiene-centric features, some models boast built-in nightlights, which subtly illuminate the bathroom at night, guiding you safely and comfortably without the harshness of traditional lighting. For those who value customization, there are toilets with adjustable settings, allowing you to control features such as seat temperature and water pressure for bidet functions, tailoring the bathroom experience to your personal preferences.
These innovations are more than just luxury additions; they represent a thoughtful integration of technology designed to enhance daily routines. The focus on user experience is evident in every detail, from the ergonomic design of the seats to the efficiency of the flush, all aimed at providing a more comfortable, hygienic, and enjoyable use.
By incorporating these advanced features, Kohler, Toto, and Duravit are setting new standards in bathroom design, prioritizing the user’s comfort and convenience at every turn.
Boost Home Value with a Modern Toilet Installation
Upgrading to a modern toilet from esteemed brands like Kohler, Toto, and Duravit can be a strategic move for homeowners looking to enhance their property’s appeal and market value. In the competitive real estate market, the condition and features of a bathroom can play a pivotal role in attracting potential buyers.
A contemporary toilet installation, characterized by its sleek design, advanced features, and superior functionality, stands out as a highlight in home tours, showcasing the homeowner’s commitment to maintaining a modern and up-to-date living space. These high-quality fixtures not only serve to improve the daily living experience but also act as a testament to the home’s overall quality and care.
The presence of a toilet with eco-friendly water conservation technology, hygiene-enhancing features like bidet functions, and comfort-oriented elements such as heated seats, can significantly sway purchasing decisions. It sends a clear message that the property is equipped with thoughtful amenities that prioritize the well-being and convenience of its occupants.
For homeowners contemplating future resale, the installation of a toilet that aligns with these premium brands can lead to a desirable increase in home valuation. Such an upgrade reflects a wise investment in the property, appealing not only to immediate comfort and efficiency but also to long-term financial gains.
Engaging potential buyers with the promise of a luxurious and conscientious bathroom experience can set a home apart in a bustling real estate market, making a modern toilet installation a key factor in enhancing property value and appeal.
Making the Right Choice for Your Home
Selecting the ideal toilet from among brands like Kohler, Toto, and Duravit necessitates a balanced consideration of various factors unique to your home and lifestyle.
Each brand brings its own strengths to the table: Kohler is renowned for its aesthetic diversity and design-forward options, Toto leads with its advanced hygiene technologies and comfort-enhancing features, and Duravit shines with its commitment to water efficiency and environmental sustainability. Your decision should hinge on what aspects of toilet functionality are most important to you and your household.
Consider the layout and size of your bathroom. Space-saving designs such as wall-hung models may be preferable for tighter areas, offering both style and practicality. For larger bathrooms, the choice expands to include more elaborate models that can serve as the centerpiece of your space.
Budget also plays a crucial role in your selection process. While investing in a high-quality toilet from these top brands may have a higher upfront cost, the long-term savings in water usage, reduced maintenance, and durability often justify the initial expenditure. Furthermore, the added comfort and enhanced bathroom experience can be invaluable.
Lastly, think about the specific needs and preferences of your household. Families with young children or elderly members may prioritize ease of use and safety features, while tech-savvy individuals might lean towards models equipped with the latest in bathroom technology.
Taking the time to weigh these considerations will ensure that the toilet you choose not only fits your bathroom aesthetically but also aligns with your environmental values, meets your practical needs, and elevates your overall bathroom experience.
Installing Moen, WoodBridge or American Standard Toilets
Investing in your home’s comfort and functionality can significantly enhance your daily living experience, and one of the most impactful upgrades you can consider is a new toilet installation. Whether you’re renovating your bathroom or simply replacing an outdated unit, selecting the right toilet can make a world of difference.
Brands like Moen, WoodBridge, and American Standard offer exceptional options that not only improve your bathroom’s aesthetics but also bring about numerous practical benefits. This segment will delve into the benefits of opting for toilets manufactured by these established brands, highlighting the reasons why homeowners should seriously contemplate making this investment.
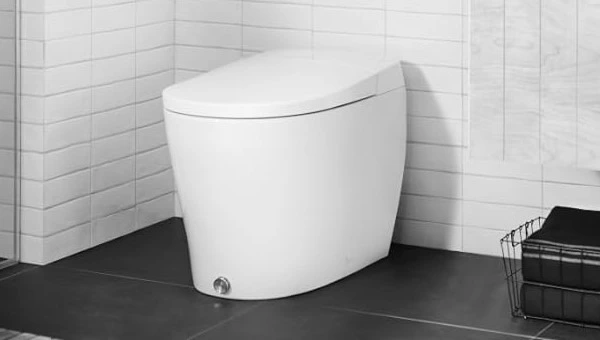
Eco-Friendly Water Conservation with Moen Toilets
Moen stands at the forefront of merging technological innovation with sophisticated design in the world of toilets. Known for its commitment to enhancing the user experience, Moen introduces features that cater to both efficiency and luxury.
A prime example of their innovation is the hands-free flushing system, which not only reduces the spread of germs but also adds a level of convenience that modern homes seek. This technology, coupled with Moen’s advanced flushing mechanisms, ensures a powerful and thorough cleanse after every use, setting a high standard for hygiene and water conservation.
Design-wise, Moen does not disappoint. Offering a diverse range of styles, from the classic elegance to the minimalist modern, their toilets are designed to complement any bathroom decor. This variety allows homeowners to maintain a cohesive look throughout their bathrooms without sacrificing functionality for aesthetics. The integration of sleek designs with advanced technology makes Moen toilets a preferred choice for those looking to invest in a fixture that combines the best of both worlds.
Moreover, Moen places a significant emphasis on water efficiency, incorporating eco-friendly solutions that do not compromise performance. Their toilets are engineered to use water more effectively, ensuring that each flush contributes to a more sustainable environment.
This thoughtful approach to design and functionality exemplifies Moen’s dedication to innovation and elegance, making their toilets a standout choice for discerning homeowners. With Moen, users can expect a bathroom experience that is both sophisticated and smart, elevating the daily routine into a moment of luxury and efficiency.
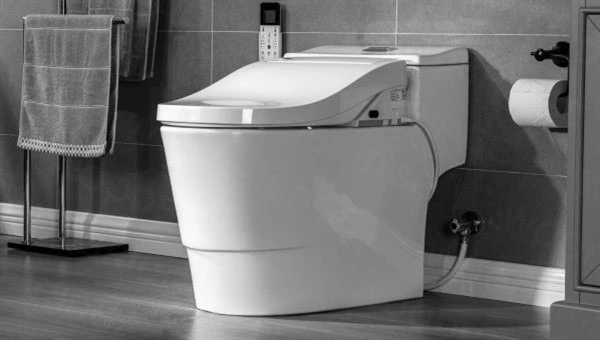
Advanced Hygiene Features of WoodBridge Toilets
WoodBridge toilets set the standard for advanced hygiene in the bathroom space, embodying the perfect blend of form and function. Noteworthy for their innovative features, these toilets are equipped with bidet capabilities that offer a refreshing and thorough clean, reducing the need for toilet paper and enhancing overall hygiene.
One of the standout features is the integration of self-cleaning nozzles, which automatically sanitize after each use, ensuring a consistently clean experience. In addition to this, some models boast UV light technology, a cutting-edge solution that works to eliminate germs and bacteria, maintaining a sanitary environment within your bathroom.
The design of WoodBridge toilets further supports hygiene efforts. Their sleek, seamless construction not only adds a modern aesthetic to any bathroom but also eliminates hard-to-reach areas where bacteria typically accumulate. This thoughtful design simplifies the cleaning process, making it easier to maintain a pristine bathroom.
Moreover, the inclusion of touchless flushing mechanisms and soft-close seats minimizes contact points, thereby reducing the spread of germs. This feature is especially valuable in a time when hygiene is paramount, offering users a safer, more hygienic bathroom experience.
WoodBridge’s commitment to hygiene and cleanliness through innovative design and technology showcases their understanding of the modern consumer’s needs, making their toilets a leading choice for those prioritizing cleanliness in their bathroom renovations.
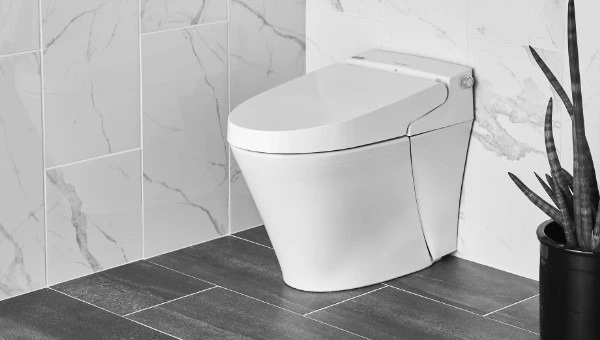
Durability and Longevity with American Standard Toilets
American Standard is a brand that has mastered the art of combining timeless designs with the latest in toilet technology. With a history that stretches back over a century, American Standard toilets have evolved to cater to the modern homeowner’s diverse needs. Their range includes high-efficiency models that significantly reduce water usage, supporting the global push towards sustainability without sacrificing performance. These toilets are a testament to American Standard’s commitment to innovation, offering features such as touchless flushing mechanisms that promote a more hygienic environment and eliminate the need to physically touch the toilet for flushing.
Moreover, American Standard has seamlessly integrated elegance into their practical designs, ensuring that each toilet model enhances the bathroom’s aesthetic appeal. Whether you’re renovating an older home or building a new one, American Standard toilets are designed to complement any bathroom style, from the classic to the contemporary. The brand’s dedication to quality and innovation is also evident in their efforts to improve user comfort. Models equipped with advanced flushing systems not only conserve water but also maintain superior bowl cleanliness, thereby reducing the time and effort spent on maintenance.
In bridging the gap between tradition and innovation, American Standard provides homeowners with a wide variety of toilets that meet stringent industry standards. This commitment ensures that regardless of your specific requirements—be it water efficiency, ease of cleaning, or a modern design to elevate your bathroom’s look—American Standard has a solution that aligns with your values and lifestyle. Their enduring legacy is not just in the products they offer but in their continuous pursuit of excellence and their ability to anticipate and address the needs of future generations.
Enhancing Bathroom Aesthetics with Modern Toilet Designs
The choice of toilet significantly influences the overall design and feel of your bathroom. Brands like Moen, and WoodBridge, and American Standard are at the forefront of integrating modern design principles into their products, offering a variety of styles that elevate bathroom interiors.
These toilets are characterized by their sleek lines, minimalistic shapes, and innovative features that blend seamlessly into contemporary bathroom aesthetics. Whether you prefer the simplicity and compactness of a one-piece toilet or the sophistication of a wall-hung model, there is a design to meet every preference and spatial requirement.
American Standard toilets often feature a classic yet modern design that fits well in any bathroom setting, providing a balance between traditional durability and contemporary aesthetics. Moen focuses on combining eco-friendliness with modern design, offering toilets that are as stylish as they are sustainable.
Their designs often incorporate smooth contours and integrated tanks that contribute to a more streamlined and neat appearance. WoodBridge takes modern luxury to the next level with its collection of toilets, emphasizing sleek, uninterrupted lines and high-end materials that add a touch of elegance and sophistication to the bathroom space.
Beyond aesthetics, these modern toilets incorporate smart design choices that enhance usability and maintenance. For instance, smoother surfaces and concealed trapways not only contribute to a more visually appealing toilet but also facilitate easier cleaning and upkeep. The integration of innovative flushing systems and rimless designs further ensures that these toilets remain hygienic and functional while boasting an attractive exterior.
By choosing a modern toilet design from Moen, WoodBridge, or American Standard, homeowners can achieve a bathroom that is both visually stunning and aligned with the latest trends in home design, making the bathroom not just a functional space but a statement of personal style and preference.
Improved Comfort and Accessibility Features
Comfort and accessibility take center stage in the design ethos of brands like Moen, WoodBridge, and American Standard. These manufacturers understand that the usability of a toilet extends beyond simple functionality, prioritizing features that cater to the needs of all individuals.
Height is a key consideration, with many models offering comfort-height options that stand a few inches taller than standard toilets. This elevation is more than a mere design choice; it facilitates easier access for users, making the act of sitting down and standing up more comfortable for seniors, those with mobility issues, and anyone who may benefit from a higher seat.
In addition to height adjustments, certain models from these brands incorporate design innovations aimed at enhancing user support and safety. For instance, some toilets are equipped with specially designed seats that are both ergonomic and more comfortable for extended periods of use.
Features like integrated grab bars can also be found, offering additional stability and assistance for users who require extra support. These thoughtful design elements are reflective of a broader commitment to inclusivity, ensuring that the bathroom remains a safe and comfortable space for everyone.
Beyond these physical attributes, the focus on creating an accessible bathroom environment is further evidenced by the thoughtful placement of controls and easy-to-use flush mechanisms. By simplifying the operation and ensuring that key features are within easy reach, brands like Moen, WoodBridge, and American Standard make daily bathroom routines more manageable for a diverse range of users.
This holistic approach to comfort and accessibility underscores the importance of selecting a toilet that not only meets the aesthetic and functional needs of a household but also addresses the well-being and ease of use for all individuals who call it home.
The Value of a Professional Toilet Installation
Embarking on a toilet installation project might seem like a manageable task, but the intricacies involved often call for the expertise of a professional. Expert installers bring a wealth of experience and specialized tools to the table, which are critical for a seamless and efficient installation process.
They are adept at handling the complexities that come with aligning the toilet perfectly, ensuring a secure fit, and making all necessary water and waste connections without error. This level of precision is crucial in preventing common issues such as water leaks and improper sealing, which can lead to water damage and costly repairs down the line.
Professional installation services often include a thorough inspection of the existing plumbing system, identifying any potential problems that could impact the new toilet’s functionality. This preemptive approach addresses issues before they escalate, safeguarding your investment and ensuring long-term satisfaction.
Moreover, opting for a professional installation provides the added advantage of warranty protection. Most services offer a warranty not only on the labor but also extend the manufacturer’s warranty, covering defects and malfunctions. This coverage affords homeowners peace of mind, knowing that any unforeseen issues will be resolved promptly and without additional out-of-pocket expenses.
The expertise of a professional installer also extends to guidance on the best toilet models that suit your specific needs, including considerations for water efficiency, design, and features that enhance comfort and accessibility. Their advice can be invaluable in making an informed decision that aligns with your preferences and budget.
In essence, the value of professional toilet installation lies in the assurance of quality, efficiency, and reliability. It eliminates the guesswork and potential pitfalls of a DIY approach, setting the stage for a worry-free and functional upgrade to your bathroom.
The Long-Term Savings of a New Toilet Installation
Investing in a new toilet from reputable brands like Moen, WoodBridge, or American Standard is not merely about enhancing the aesthetic appeal of your bathroom; it’s a strategic financial decision that promises tangible long-term benefits.
These contemporary toilets are engineered with cutting-edge water conservation technologies, such as dual-flush systems and low-flow capabilities, designed to significantly reduce your household’s water consumption. The immediate effect of this reduction is seen in lower monthly water bills, a saving that accumulates substantially over time.
Furthermore, the exceptional build quality and innovative designs of toilets from these brands mean that they are less prone to common issues like leaks and clogs.
This robust construction minimizes the need for frequent repairs or parts replacements, translating to considerable savings in maintenance costs. The longevity of these toilets also means that you won’t need to invest in a new installation anytime soon, further contributing to the cost-effectiveness of your initial purchase.
By choosing a Moen, WoodBridge, or American Standard toilet, you’re not only opting for a product that offers superior performance and aesthetic value but also making an eco-friendly choice that aligns with sustainable living practices. The environmental benefits of reduced water usage, paired with the financial advantages of lower utility bills and decreased maintenance expenses, underscore the economic prudence of upgrading to a modern toilet.
In conclusion, the decision to install a new toilet from these leading brands is an investment that pays dividends in multiple ways. The upfront costs are offset by the long-term savings in water bills and maintenance expenses, making it a wise choice for homeowners looking to enhance their bathroom while also making a financially sound and environmentally responsible decision.
FAQ’s About Toilet Installation
How much should a toilet installation cost?
On average, the cost of installing a toilet is estimated to fall within the range of $500 to $1,000 per installation. If you opt for a single-piece toilet, the cost of labor alone can range from $250 to $400. Meanwhile, the installation of a two-piece toilet typically requires more effort and, consequently, may cost a little more. Generally, the cost of installing a two-piece toilet typically ranges between $300 and $450.
Can I install my own toilet?
If moving heavy items is not an issue for you, then you can certainly handle transporting a toilet, which usually weighs between one hundred and one hundred and fifty pounds. And if you find yourself at home with the necessary tools and the desire to undertake a home repair project, you should definitely take advantage of the opportunity and see the project through to completion.
Is replacing a toilet a major job?
Undertaking a toilet replacement as a do-it-yourself project can be feasible for individuals who have the essential skills and resources to carry out the task themselves. Such a person would assume full responsibility for the project. However, before embarking on such an endeavor, one should consider their level of expertise in plumbing and other home improvement projects specifically geared towards homeowners.
Should I hire a plumber to replace a toilet?
When attempting to replace a toilet independently, it is important to consider certain limitations. One limitation to keep in mind is that a plumber has the ability to make modifications to the toilet, which can increase the effectiveness and longevity of the wax ring seal. In the event that you do install the toilet yourself, it is possible that it may need to be reinstalled sooner rather than later.
Conclusion
For those seeking a reliable plumber in Clovis, look no further than our family-owned and operated business. We pride ourselves on delivering top-notch service at affordable rates. Our team possesses a wealth of experience and specializes in providing tailored plumbing solutions to meet the needs of each individual client. No matter the size or complexity of your project, you can count on Clovis Plumbing Services to get the job done right.

