There are few things more exasperating than a running toilet. It can keep you awake at night, and more importantly, lead to wastage of hundreds of gallons of water, not to mention the effect on your water bill. However, the usual culprit is often the humble fill valve. Rather than calling a plumber, with a little time and patience, you can replace your toilet’s fill valve. Ready to master your throne? Let’s dive in!
Table of Contents
Understanding Your Toilet’s Fill Valve
Behold, the unsung hero of your porcelain throne – the fill valve! This workhorse, sometimes called a ballcock, might seem unassuming but it plays a crucial role in your toilet’s operations. Think of it as the conductor, orchestrating the water flow into your toilet tank after each flush. It diligently monitors the water level, filling the tank after a flush and then automatically shutting off the water when the tank reaches its limit. This way, it keeps everything running smoothly and efficiently.
Knowing how your fill valve operates is the first step in becoming the master of your own throne. So next time you hit that flush lever, remember the mighty fill valve and its role in maintaining your toilet’s harmony.
Identifying the Need for a Fill Valve Replacement
What are the telltale signs that your fill valve is crying out for help? Constant hissing noises, water that doesn’t know when to stop trickling into the bowl long after you’ve sent your flush on its merry way, or a tank that dawdles when it should be filling up fast. And in the direst of circumstances, your throne refuses to perform its essential duty – flushing.
These are the symptoms of a sickly fill valve that is begging to be relieved of its duties and replaced. Never fear, DIY enthusiasts, while these signs might seem alarming, they are simply your fill valve’s way of whispering (or sometimes shouting) “Help, I need a replacement!” Listen closely, and you can prevent a minor inconvenience from turning into a royal plumbing debacle.
Choosing the Right Fill Valve for Your Toilet
Selecting the perfect fill valve for your porcelain kingdom is akin to choosing the right scepter for a king – it must fit flawlessly. Most toilets are pretty democratic and accept universal fill valves that you can effortlessly pick up from any local hardware store.
But here’s a pro tip for you: be a savvy shopper! Unbolt your old, worn-out fill valve, and take it along to the store. It’ll be your best bet in ensuring you walk out with an identical, perfect replacement. After all, the devil is in the details, and we don’t want any surprise mismatches, do we?
However, do remember that not all toilets are created equal. There are those elite few – the high-end models, the antique pieces, the ones with a touch of regal eccentricity – these might demand specific, model-specific fill valves. So, my DIY comrades, always double-check. After all, even a throne fit for a king needs the right fill valve to function properly!
Related content: Flush Valve Replacement
Tools and Materials Needed for a Fill Valve Replacement
So, we’re clear on what the fill valve does, why it needs replacing, and how to choose a new one. Now, let’s gather our tools for the task at hand. Much like a king needs his sword and a chef needs his knife, you, the DIY enthusiast, need your tools to accomplish this mission.
First off, you’ll need an adjustable wrench. This tool is as versatile as it gets and is an absolute must for any plumbing project. Next, make sure you have a bucket nearby. This will be your trusty sidekick to catch any rogue water during the process. Also, have a sponge or towels on standby to mop up any excess water because let’s be real, plumbing work can be a bit of a splashy affair!
Last but not least, a pair of pliers might come in handy for those stubborn nuts and bolts that refuse to play nice. And, of course, you can’t forget your shining knight in this DIY saga – your new fill valve.
When purchasing your new fill valve, take note that some models come with the necessary installation materials such as a coupling nut and rubber washer, while others might necessitate an additional trip to the store. Be sure to check what’s included in the box of your new fill valve to avoid any mid-project surprises.
And there you have it! You’ve got your tools, you’ve got your new fill valve, and you’re ready to conquer this project. Let’s get that throne back in working order, shall we?
Related content: Toilet Flapper Replacement
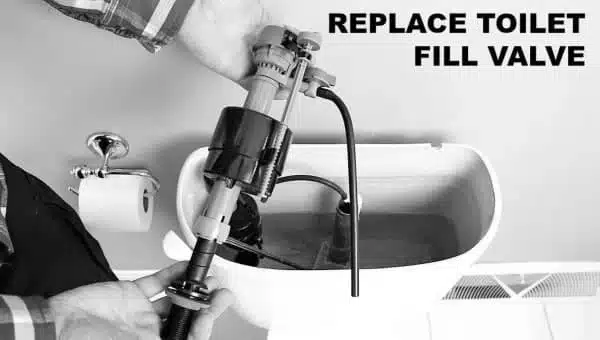
Steps to Remove Your Toilet’s Fill Valve
Time to roll up your sleeves and get to work! With your tools at hand and your new fill valve ready, let’s embark on this plumbing journey. Begin by asserting your dominance over the water supply and turning it off. Then, boldly command your toilet to flush, effectively emptying its tank of water. Remember those towels or sponge we talked about? It’s time for them to shine as you mop up any water still in the tank.
Next comes the tactical dismantling. Start with the water supply line and then move on to the lock nut securing the old fill valve underneath the tank. A little bit of elbow grease and your adjustable wrench should convince them to part ways with your toilet tank. Now, you should be able to carefully lift out the old fill valve. Remember to treat it with respect; after all, it has served you well!
That’s it, folks! You’ve successfully removed your old fill valve. Take a moment to bask in the glory of your DIY prowess before we move on to the next steps of installing your new fill valve. You’re well on your way to restoring the balance in your porcelain kingdom. Carry on, brave DIY knight, the throne awaits its new conductor!
Steps to Replace Your Toilet’s Fill Valve
- Strip the small components such as the angle adapter, lock nut, shank washer, coupling nut and cone washer to install the valve. The cone and shank washers are joined as one. Carefully pull the cone/shank washer away from the angle adapter in order to free the coupling nut, lock nut, and angle adapter.
- Gently take out the cone washer from the middle of the shank washer. Have the shank washer positioned on the new valve’s threaded shank, having the flat surface placed against the valve. The coupling nut and cone washer can be used along the supply line to be connected to the threaded shank as in step 8.
- After the fill valve replacement is installed, its indication of “critical level” should be above the overflow pipe by at least an inch. In many places, this is a plumbing code. On a fill valve of Fluidmaster 4ooa, the critical level is indicated by “CL”.
- The threaded shank can be twisted in or out of the body of the valve in order to adjust the fill valve’s height. Fluidmaster 4ooa height adjustment ranges from 9-14 inches. It is normal to hear a clicking sound on some models.
- Place the fill valve replacement in the tank and press against the valve shank (not from the top) as you tighten the lock nut by hand only. Ensure not to over-tighten so as not to crack the tank. Check that the float cup doesn’t touch the walls of the tank, flush valve, or trip system.
- Before you proceed, check the chart to identify your water supply connection type and make use of the proper assembly components needed to correctly reconnect the supply line. Do not seal the fittings with plumbers’ putty.
- Now the coupling nut should be tightened by hand only (ensure you don’t over tighten), with the right washers in position. The cone washer should not be used on a plastic supply line. And if you have braided connectors (stainless steel), then the coupling nut and cone washer are not required.
- Connect one side of the black refill hose to the angle adapter and the other side to the nipple near the valve top. Ensure not to insert the refill hose down below the level of water in the overflow pipe. Otherwise, water will siphon from the tank, through the overflow pipe, making the valve go off and on trying to ensure the tank stays full.
- Turn the water supply on and have the water level in the tank adjusted as desired. Inspect the tank for leakages, and also check that it flushes properly. At this point your work has been successful!
Common Challenges and Solutions
Embarking on a DIY adventure isn’t always smooth sailing, and replacing your toilet’s fill valve may occasionally toss a wrench in your plans. The most common hiccup? The lock nut. This can sometimes act like an obstinate gatekeeper, refusing to budge.
If you come across this, try introducing the lock nut to your friend, the lubricant. A bit of it can convince the toughest of nuts to loosen up. Another trick is to apply some heat with a hairdryer to expand the metal slightly, making it easier to turn.
Moving on, once your new fill valve has taken its rightful place in your toilet tank, getting the adjustment just right might require a bit of patience. You may need to experiment with different water levels before your toilet begins to function perfectly again. Remember, Rome wasn’t built in a day and neither will your toilet’s perfect water level.
These minor obstacles should in no way deter you, brave DIY warrior, from completing your mission. Every journey has its challenges, and overcoming these is what makes the journey worthwhile. So, buckle up and be prepared to conquer any curveballs on your path to DIY greatness!
Maintaining Your Toilet’s Fill Valve
Keeping your fill valve in tip-top shape is the secret sauce to extending its lifespan and avoiding any potential plumbing nightmares. Picture it as regularly servicing your car to keep it running smoothly.
The first step is to be on the lookout for any leaks, a telltale sign of a distressed fill valve. Next, pay attention to the water level in your toilet tank. It shouldn’t be too high that it’s about to overflow or too low that your toilet can’t flush properly. This Goldilocks principle also applies to your fill valve. Lastly, don’t forget to give your fill valve a good cleaning now and then. Mineral build-up is a common issue in plumbing and can lead to reduced performance over time.
So, roll up those sleeves and grab your scrubbing tools – your fill valve will thank you for it! Just like how the King keeps his kingdom secure, regular maintenance of your fill valve will keep your throne functional and your kingdom (or rather, your bathroom) free from any royal messes!
FAQs
Can I replace a toilet fill valve myself?
Fortunately, the task of repairing your toilet fill valve is within the capabilities of any homeowner. Minimal plumbing experience and time investment are required.
How much does a plumber charge to replace a toilet fill valve?
The average national cost for repairs ranges from $150 to $250, with the majority of individuals often spending an average of $200 to replace a fill valve on a toilet that is running slowly.
What happens when a fill valve fails?
A damaged fill valve allows too much water into your toilet’s tank, increasing the volume of water sent down the drain with each flush. Listen carefully to any weird sounds coming from your toilet to detect a malfunctioning fill valve.
Conclusion
Our team of professionals, who have a wealth of industry experience, offer personalized attention and expertise in their respective fields. Our professionals has extensive training and certification, guaranteeing their ability to perform exceptionally well at a reasonable cost. We exclusively employ top-quality materials and state-of-the-art technology, ensuring exceptional workmanship.
