As a new homeowner, your mind is likely occupied with the exciting task of settling into your new home. However, it’s essential to understand and take care of the nuts and bolts of your home too. Let’s focus on one such element – the plumbing, particularly the compression faucets. These are the most traditional types of faucets, and knowing how to fix them can save you time, money, and unexpected trips to the hardware store.
Table of Contents
Understanding What Compression Faucets Are
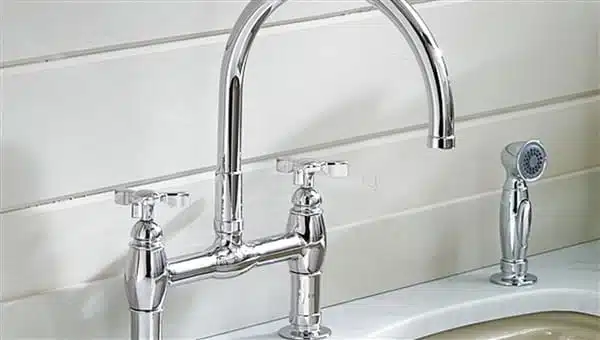
Compression faucets serve as a classic element in numerous households, continuing to prove their reliability and durability over time. Characterized by their separate handles for controlling hot and cold water, these types of faucets operate on a straightforward mechanism.
By compressing a rubber or silicone washer against a valve seat, they manage the water flow, providing you with a desired temperature and pressure. Despite their simplicity, they’re not immune to wear and tear. In fact, over time, these faucets can develop a few glitches, necessitating a bit of your attention and some handy work.
Identifying Common Problems with Compression Faucets
Being able to accurately diagnose issues with your compression faucets is the first step towards a successful repair. There are several telltale signs to watch out for that indicate your faucet may need some attention.
The most common problem to encounter is a persistently dripping or leaking faucet. This can be a frustrating issue, especially if the drip is constant, as it can lead to wasted water and higher utility bills. It’s often the result of a worn-out washer or seal, which can no longer properly restrict the water flow.
Another prevalent issue with compression faucets is a handle that is tough to turn. If you find yourself straining to open or close the faucet, the stem or the washer could be worn out or damaged. It might also signify that there’s a build-up of mineral deposits that are hindering the smooth operation of the faucet’s internal components.
Inconsistent water flow can also point to a problem. If the water pressure is unusually low, or if it varies widely for no apparent reason, there could be a clog or blockage somewhere in your faucet. Mineral deposits, debris, or a damaged component could be the culprit here.
Sometimes, the issue might be a bit more elusive, such as when the faucet squeaks or makes a whining noise when used. This might indicate that the handle or stem needs lubrication, or that a component within the faucet is loose.
Recognizing these common issues is crucial. While some might seem minor, ignoring them can lead to bigger problems down the line. In the next sections, we’ll delve into the steps you can take to fix these issues yourself.
Basic Tools Required for Faucet Repair
Before you dive into the repair, it’s crucial to assemble all the necessary tools for the job. First on your list should be an adjustable wrench, a versatile tool that can tighten and loosen various nuts, bolts, or fittings that are found in your faucet assembly.
Next, you’ll need a screwdriver to remove and reattach any screws that secure the different components of your faucet. Be sure to choose one that matches the size and type of screws used in your faucet.
As you’re dealing with a compression faucet, there’s a high probability that a worn-out washer is the source of your problems. Therefore, it’s smart to have replacement washers and seals on hand. Remember to make sure that the replacements are the same size as the originals.
Finally, don’t forget the teflon tape. Also known as Teflon tape, this thin white tape is used to wrap the threads of the faucet’s stem, providing a better seal and preventing leaks when reassembled.
With these tools at your disposal, you’re ready to tackle your faucet repair. But before you start, a word of caution: always turn off the water supply to the faucet you’re working on. This critical step helps prevent accidental water spills or, worse, minor flooding in your work area.
Step-by-Step Guide to Repairing Compression Faucets
Let’s dive into the actual repair process. Begin by carefully removing the faucet handle. To do this, use your screwdriver to detach the cap that sits atop the handle, exposing the hidden screw beneath. Once the screw is unscrewed, you can effortlessly lift the handle off.
Next up is the stem removal. For this, you will need your adjustable wrench. Gently unscrew and take out the stem or the valve stem assembly, revealing the washer underneath.
If the washer appears to be in a state of disrepair, it’s time for a replacement. Ensure the new washer is an exact match in size to the old one. Once the new washer is securely in place, it’s time to reassemble your faucet.
Start by wrapping teflon tape around the stem to provide a robust seal that will help prevent future leaks. Once you’ve done this, screw the stem back into place. Follow this by replacing the handle and finally the cap.
The final step is a test run. Turn your water supply back on and observe the faucet in operation. If all has gone according to plan, any previous leaking should have ceased. If, however, the faucet continues to drip, it may be time to seek assistance from a plumbing professional.
This step-by-step process is designed to guide you through a basic repair of a compression faucet. It’s important to note, though, that some issues may go beyond a worn-out washer. If the problem persists despite your repair efforts, don’t be afraid to call a professional to ensure your plumbing remains in peak condition.
When to Seek Professional Help
There will be instances when a simple washer replacement won’t rectify the problems with your compression faucets. More complex issues, such as valve seats that have been eaten away by corrosion or a stem that has sustained a crack, may come into play. These situations call for a level of expertise that goes beyond basic home repairs.
In such scenarios, reaching out to a professional skilled plumber is your best course of action. These experts possess the requisite knowledge and tools to handle intricate repairs, averting any additional damage to your home’s plumbing system. As a rule of thumb, if the issue with your faucet persists despite your repair attempts, it’s time to turn to the professionals.
This will ensure that your plumbing remains efficient and functional, keeping your household routine undisturbed. It’s always important to remember that while DIY repairs can be rewarding and cost-saving, knowing when to call in the pros is equally essential in maintaining the integrity and longevity of your home systems.
Preventive Measures to Keep Your Faucets in Good Shape
Maintaining the condition of your compression faucets doesn’t have to be a daunting task. Implementing certain preventive strategies can prolong their lifespan and keep them functioning optimally. Here are some tips:
Firstly, make it a habit to inspect your faucets on a routine basis. Early detection of leaks or drips can help nip potential problems in the bud and prevent escalation into larger, more complicated issues. This simple step can help you stay ahead of any faucet malfunctions and reduce the need for extensive repairs down the line.
Secondly, it’s critical to use your faucets gently. Avoid applying excessive force when turning the handles, as doing so can lead to premature wear and tear of the washers. A gentle, firm turn should suffice to control the water flow effectively.
Lastly, ensure regular cleaning of your faucets. Over time, mineral deposits can accumulate, potentially hindering the smooth operation of your faucets and impacting the water flow. By cleaning your faucets routinely, you can keep them free from such deposits and maintain their efficiency.
Incorporating these preventive measures into your homeownership routine can help you keep your compression faucets in top condition, saving you from unnecessary hassles and expenses in the future. Remember, the key to managing your home systems effectively is a blend of regular maintenance, timely repairs, and mindful usage.
FAQs
What is the difference between a cartridge and a compression faucet?
Cartridge faucets are very maneuverable and may be easily rotated without the need for exerting any force. Conversely, compression water faucets necessitate pressure in order to manipulate the handles. The name of these faucets is derived from the hollow metal cartridge located inside the faucet.
What is usually the cause of a leak in a compression faucet?
A worn-out washer is the primary cause of a leak in a compression faucet. Over time, the washer in the faucet, which stops the water flow when the handle is tightened, becomes worn out. If the washer becomes defective, it fails to halt the flow of water, resulting in a leak from the faucet.
What is the most common cause of leaking compression fittings?
Improperly tightening the nut can lead to deformation of the ferrule, resulting in joint failure. Undoubtedly, excessive tightening is the primary factor leading to leaks in compression fittings.
